A blog about crafts with young kids ranging from babies all the way up to school-aged children.
Thursday, November 10, 2011
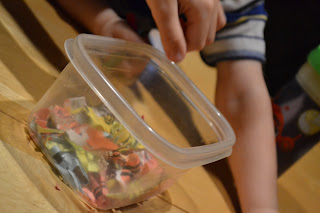
Crazy Crayons
Supplies you will need:
Crayons
Baking sheet
Silicone ice cube or Popsicle molds
Aluminum foil
How to make Crazy Crayons:
Preheat oven to 180 degrees
While the oven is preheating, peel and break crayons into small pieces.
Place small pieces of crayons in the ice cube molds.
Cover a baking sheet with aluminum foil and place the molds on the top of the baking sheet.
Put the molds on the baking sheet in the oven for about 15 minutes. (It may take more time depending on your oven)
When the crayons have fully melted, take the molds out of the oven and let cool before popping them out.
Have Fun!
Crazy Crayons are an easy way (with not to many supplies or planning on Mom’s part) to provided hours of fun. You can give them out as gifts for classmates or friends.
*Tip: Have a container for crayon wrappers to go into or they will end up everywhere!
Thursday, October 27, 2011
Egg Carton Spiders and Ghosts!
Egg Carton Spiders
This is a simple and low material craft that will help your child have fun being creative while also decorating for Halloween.
For this craft, you need:
Egg cartons
Scissors
Tape or glue
Yarn
Paint, markers, crayons or anything you want to decorate your egg cartons
1) Cut the egg carton into 12 sections.
2) Use the scissors to poke a hole in the top of the egg carton
3) Let you children go crazy! They can decorate as much or as little as they would like. Whatever they do, it will look cute.
4) When your child is finished decorating tape or glue the leg of your spider on the inside of your spider
5) Thread yarn through the hole at the top of the spider and make a knot.
6) Hang your decoration!
It is simple, easy, and really fun for your children.
*To make simple ghosts cut tissue paper let your children color the tissue paper and slide it over the egg carton.*
Tuesday, February 1, 2011
Valentine's Day Menu Options
One of my favorite things about Valentine's day is making the day special by sneaking in little notes in lunch boxes, leaving messages around the house, and making Valentine's-themed food for everyone to enjoy. Here are a few ways that you can make the day a little extra special:
* Make heart-shaped ice cubes. Many places sell ice cube trays that can be used (IKEA was my favorite and affordable). If you really want to make it creative you can use a red or pink juice such as cranberry juice or pink lemonade.
* Use a cookie cutter to cut a heart-shaped sandwich. This is great for school lunches. Even a bunch of little hearts are really fun, too!
* The Dollar Tree often sells small, shaped Reynolds foil bowls that come in a variety of shapes including...you guessed it...a heart! Mini pot-pies, dessert pies, or even casseroles, pasta dishes, and less traditional meals are great in these individual serving-sized containers.
* Heart shaped pancakes make a really fun breakfast!
* An easy to make treat is heart shaped rice crispy treats. Use strawberry flavored marshmallows or food coloring for a pink tint to your treat. You can also add some extra sweets to your sweets by adding the cinnamon candies, sweethearts, M & M's, or other candies.
* Check out our blog on the Sweet Heart Pops from January's edition of Family Fun magazine.
Saturday, January 29, 2011
Sweet Heart Pops
This is an adorable idea for teacher gifts or gifts for friends during Valentine's celebrations. This recipe will make 6 lollipops and you can present them nicely using lollipop bags that can be found at craft stores such as Michael's or JoAnn's and tied off with a ribbon.
Ingredients:
12 mini candy canes
6 paper lollipop sticks (6 inches long)
1/2 cup white chocolate chips
1 1/2 teaspoons vegetable oil
Red, white, and pink nonpareils or sugar sprinkles
1. Heat oven to 235 degrees. Use a baking sheet lined with parchment paper. Place the candy canes together so they create a heart shape and bake them for 10 minutes.
2. Quickly slide the parchment paper and the candy canes onto a working surface. Use your fingers (this is a job for the adult) to pinch the candy canes around the lollipop stick. The stick should start at the top of the heart where the two candy canes meet and go through the bottom in the middle.
3. Use the microwave to melt the white chocolate chips and oil together. Microwave in 10-second intervals and stir in between heatings.
4. Once the chocolate was completely melted, spoon the mixture into the center of each heart, then top with the nonpareils or sugar sprinkles.
Let the pops cool completely before serving or wrapping.
Labels:
food,
pdx kids,
Sweet Heart Pops,
treats,
Valentine's Day
Sunday, January 23, 2011
Yarn Ornaments
This craft is great and easy for children of all ages. Create a glue mixture using 1/4 cup of cornstarch and 1/2 cup of water in a saucepan. Stir until the mixture is smooth then heat the mixture over medium heat until it is thick and translucent. Remove from the heat and allow it to cool to the touch. This mixture can be stored in the fridge for a week. If it gets too gelatinous, then stir in 1/4 cup of hot water.
Cut yarn into pieces of about a foot long. Use a cookie cutter to create a desired shape or you can free form it but cookie cutters are great ideas for smaller children. Put the cookie cutter down on the shiny side of parchment paper. Have your child coat a piece of yarn in the cornstarch glue so it is coated. Run the yarn through their thumb and forefinger to remove excess glue and then place the yarn inside the cookie cutter. Repeat this process until the cookie cutter has a thin layer of yarn throughout the entire shape. Clean hands then come back and push the yarn flat.
Gently remove the cookie cutter (this is probably best for an adult to help small children with) and allow the yarn ornament at least a day to dry completely. If you need to speed up the drying process you can place the parchment paper and ornaments directly into the oven set on "warm" for an hour or two.
You can use these for many different occassions. Use red, white and pink yarn and a heart-shaped cookie cutter for Valentine's Day. Green yarn with a christmas tree cookie cutter can be used for Christmas. This can also be used for mother's day, birthdays, or even general decoration.
Tuesday, January 18, 2011
Paper Weaving
This is a great craft for kids and it is totally affordable. You can use many different types of paper or even fabric. Paper bags work great but so does construction paper. If there is a theme or holiday around the corner you can paint the paper using colors that bring the theme or holiday into your craft. When using paint, you can add a little bit of water to the paint so when it dries it doesn't tend to flake and it spreads easier.
You will want several panels of paper (it really depends on how many strips of paper you need and how many varieties of paper patterns you want to use). Pick one paper that will be used as the base. fold this panel into half and mark a line one inch from the edge of the unfolded side. Make slits from the folded side to the line on the unfolded side at one inch intervals.
Take the other papers to be used and cut one inch strips (make sure you cut the paper so the strips are long enough to fit from side-to-side on the base paper).
Weave the strips of paper through the slits in the base. Using a glue stick or tape, secure the ends of the strips to the base.
Enjoy your beautiful cloth-like craft!
Subscribe to:
Posts (Atom)